GET RID OF BREATHLESSNESS WITH PHYSICAL THERAPIES
What is shortness of breath?
Shortness of breath is the feeling that you are out of breath like you can’t catch your Sbreath or that it’s hard work to inhale fully. Sometimes, it can feel like tightness around the chest. The medical terms for these symptoms are “breathlessness” and “dyspnea.”
Feeling short of breath can be normal. It can happen, for example, if you’re exercising, you’re at a high altitude, or you’re anxious. But if the breathlessness doesn’t go away when you rest, or you feel short of breathe after little or no activity, that’s a sign that something is not right. Shortness of breath can come on suddenly in otherwise healthy people. It can also be a part of daily life for many people with a chronic lung or heart condition.
REHABILITATION OF BREATHLESSNESS
Best Positions to Reduce Shortness of Breath
In combination with the pursed lips breathing and the diaphragmatic breathing techniques, these positions to reduce feelings of shortness of breath can help you relax and reduce the sensation of breathlessness.
Sitting Positions to Reduce Shortness of Breath:
Typically, shortness of breath happens during activity, emotional experiences, bad or changing weather conditions or when you feel tense or stressed. Try these sitting positions to reduce shortness of breath:
Sitting Position A:
Sit in a chair or in a comfortable position keep your feet flat on the floor. Lean your chest forward a little. Rest your elbows on your knees. Place your chin in your hands (if you feel comfortable doing so Relax your neck and shoulders as much as you can Practice your breathing techniques
Sitting Position B:
If a pillow is easily available, place it on a table. Sit in a chair at the table. Keep your feet flat on the floor. Lean your chest forward some Place your arms on the table
Relax your head on your forearms (if a pillow isn’t available) or rest your head on the pillow. Use your breathing techniques
Standing Positions to Reduce Shortness of Breath:
Sometimes, shortness of breath happens suddenly. If a chair or a place to do the sitting positions isn’t available, give a standing position to reduce shortness of breath a try:
Standing Position A:
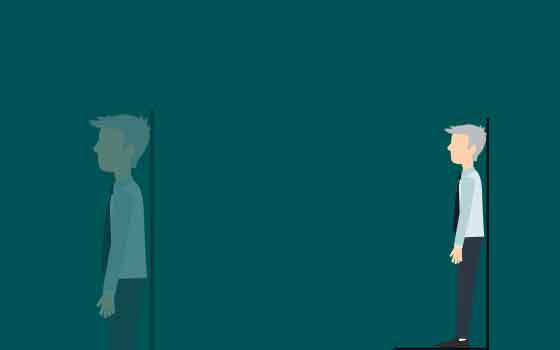
Replace with a sturdy wall Stand with your feet shoulder width apart Lean your hips on the wall
Let your hands rest on your thighs. Allow your shoulders to relax Lean forward slightly
Let your arms dangle in front of you. Remember to practice your breathing techniques
Standing Position B:
Replace with a strong piece of furniture (just below shoulder height), such as a table Stand at the furniture Place your elbows or hands on the chosen furniture Lean forward a little
Relax your neck and shoulders. You can rest your head on your forearms if your elbows are on the furniture Utilize your breathing techniques
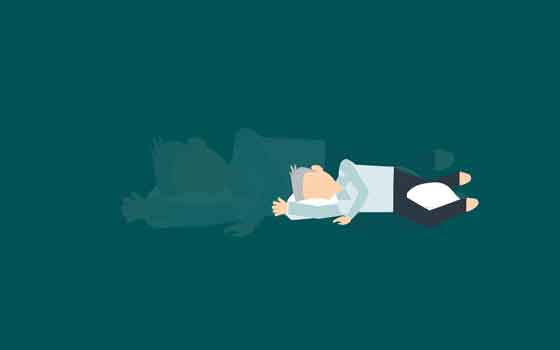
Sleeping Positions to Reduce Shortness of Breath:
If you’re at home or are awakened by an episode of shortness of breath, remain calm and consider these sleeping positions to reduce shortness of breath:
Sleeping Position A:
Lie on your side
Place a pillow between your knees
Elevate your head with a pillow or two
Keep your back as straight as possible
Relax and use your breathing techniques
Sleeping Position B:
Lie on your back
Place a pillow under your knees, so your knees are bent
Elevate your head with a pillow or two
Allow yourself to relax
Practice your breathing techniques
Taking Steps toward Easier Breathing
REHABILITATION OF BREATHLESSNESS
1. Pursed lip breathing
This simple breathing technique makes you slow down your pace of breathing by having you apply deliberate effort in each breath.
You can practice pursed lip breathing at any time. It may be especially useful during activities such as bending, lifting, or stair climbing.
Practice using this breath 4 to 5 times a day when you begin in order to correctly learn the breathing pattern.
To do it:
Relax your neck and shoulders.
Keeping your mouth closed, inhale slowly through your nose for 2 counts.
Pucker or purse your lips as though you were going to whistle.
Exhale slowly by blowing air through your pursed lips for a count of 4.
2. Diaphragmatic breathing
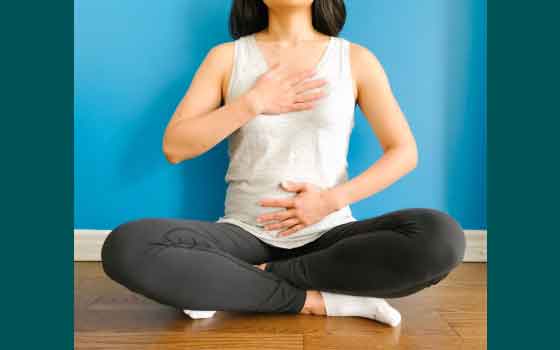
Belly breathing can help you use your diaphragm properly. Do belly breathing exercises when you’re feeling relaxed and rested.
Practice diaphragmatic breathing for 5 to 10 minutes 3 to 4 times per day.
When you begin you may feel tired, but over time the technique should become easier and should feel more natural.
To do it.
Lie on your back with your knees slightly bent and your head on a pillow.
You may place a pillow under your knees for support.
Place one hand on your upper chest and one hand below your rib cage, allowing you to feel the movement of your diaphragm.
Slowly inhale through your nose, feeling your stomach pressing into your hand.
Keep your other hand as still as possible.
Exhale using pursed lips as you tighten your stomach muscles, keeping your upper hand completely still.
You can place a book on your abdomen to make the exercise more difficult. Once you learn how to do belly breathing lying down you can increase the difficulty by trying it while sitting in a chair. You can then practice the technique while performing your daily activities.
3. Breath focus technique
This deep breathing technique uses imagery or focus words and phrases.
You can choose a focus word that makes you smile, feel relaxed, or that is simply neutral to think about. Examples include peace, let go, or relax, but it can be any word that suits you to focus on and repeat through your practice.
As you build up your breath focus practice you can start with a 10-minute session. Gradually increase the duration until your sessions are at least 20 minutes.
To do it:
Sit or lie down in a comfortable place.
Bring your awareness to your breaths without trying to change how you’re breathing.
Alternate between normal and deep breaths a few times. Notice any differences between normal breathing and deep breathing. Notice how your abdomen expands with deep inhalations.
Note how shallow breathing feels compared to deep breathing.
Practice your deep breathing for a few minutes.
Place one hand below your belly button, keeping your belly relaxed, and notice how it rises with each inhale and falls with each exhale. Let out a loud sigh with each exhale.
Begin the practice of breath focus by combining this deep breathing with imagery and a focus word or phrase that will support relaxation.
You can imagine that the air you inhale brings waves of peace and calm throughout your body. Mentally say, “Inhaling peace and calm.”
Imagine that the air you exhale washes away tension and anxiety. You can say to yourself, “Exhaling tension and anxiety.”
4. Segmental Breathing
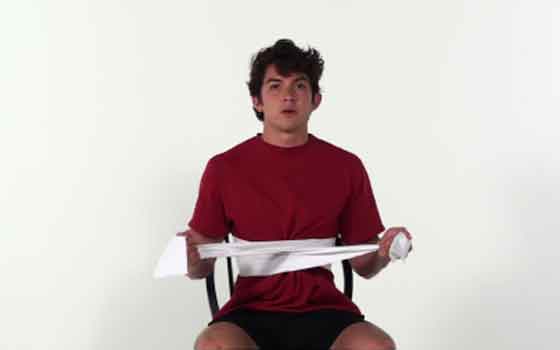
Segmental breathing targets the lateral and posterior segments of the lower lobes. However, segmental breathing techniques also may need to be directed to the middle and upper lobes if there is an accumulation of secretions or insufficient lung expansion in these areas.
Lateral costal expansion
Procedure: Hook-lying position; later progress to a sitting position. Place your hands along the lateral aspect of the lower ribs to direct the movement of the lung. Take your position, lying/sitting and then breathe out, and feel the rib cage move downward and inward. As you breathe out, place pressure into the ribs with the palms of your hands.
Posterior basal expansion
It emphasizes the posterior segments of the lower lobes. Sit and lean forward on a pillow, slightly bending the hips. Place your hands over the posterior aspect of the lower ribs, and follow the same procedure just described for lateral coastal expansion.
5. Pursed-Lip Breathing
Pursed-lip breathing is a strategy that involves lightly pursing the lips together during controlled exhalation. This breathing pattern often is adopted spontaneously by patients with COPD to deal with episodes of dyspnoea (difficult breathing). Procedure: Assume a comfortable position and relax as much as possible. Breathe in slowly and deeply through the nose and then breathe out gently through lightly pursed lips as if blowing on and bending the flame of a candle but not blowing it out. You can do it in a sitting position.
6. Box Breathing/four square breathing
This is a very popular method for relaxation and mental calmness. It is also known as four-square breathing.
Procedure: Sitting is the best position to do this exercise. 1st step is to exhale and empty your lung in 4 seconds. Then hold it for 4 seconds. Inhale in 4 sec and hold the breath for 4 sec, then again exhale in the same period of time and repeat the cycle 10 times.
7. Huffing or thoracic expansion exercise
This is a maneuver used to move secretions, mobilized by deep breathing/thoracic expansion exercises, downstream towards the mouth. A huff is exhaling through an open mouth and throat instead of coughing. Huffing helps moves sputum from the small airways to the larger airways, from where they are removed by coughing as coughing alone cannot remove sputum from small airways.
Procedure You can do it in a sitting position. You have to exhale forcefully with a repeated manner. Forceful exhalation should be a shorter period of time. It increases the lung capacity by mobilizing the secretion of the lung.
8. Deep breathing
Deep breathing helps to relieve shortness of breath by preventing air from getting trapped in your lungs and helping you to breathe in more fresh air. It may help you to feel more relaxed and centered.
To do this:
While standing or sitting, draw your elbows back slightly to allow your chest to expand.
Take a deep inhalation through your nose.
Retain your breath for a count of 5.
Slowly release your breath by exhaling through your nose
Candle or balloon blowing exercise:
Take a balloon and try to fill air in it as much as you can.
Either you can take 7-8 candles and lit it and try to blow it in single breath you can repeat it 5-10 time.
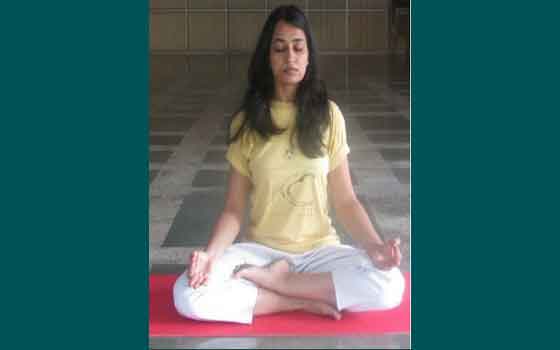
YOGA
1Lion’s breath
Lion’s breath is an energizing yoga breathing practice that is said to relieve tension in your chest and face.
It’s also known in yoga as Lion’s Pose or simhasana in Sanskrit.
To do this:
Come into a comfortable seated position. You can sit back on your heels or cross your legs.
Press your palms against your knees with your fingers spread wide.
Inhale deeply through your nose and open your eyes wide.
At the same time, open your mouth wide and stick out your tongue, bringing the tip down toward your chin.
Contract the muscles at the front of your throat as you exhale out through your mouth by making a long “ha” sound.
You can turn your gaze to look at the space between your eyebrows or the tip of your nose.
Do this breath 2 to 3 times.
Here is a guided example of lion’s breath and a couple of pose variations on it.
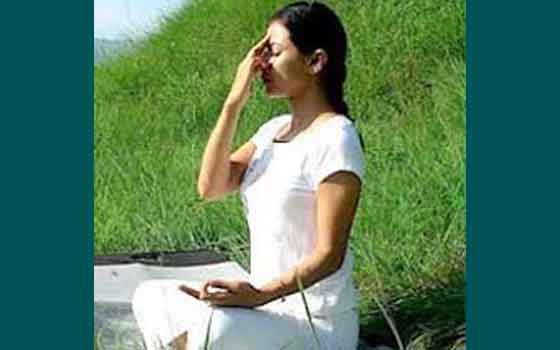
2. Alternate nostril breathing
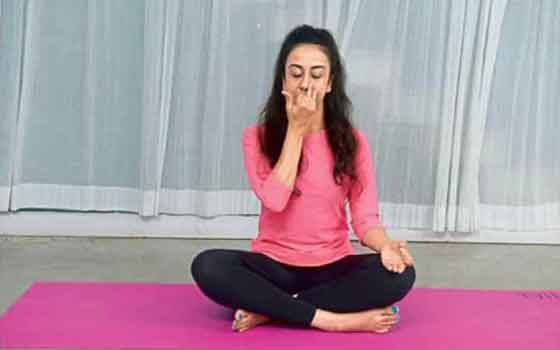
Alternate nostril breathing, known as nadi shodhana pranayama in Sanskrit, is a breathing practice for relaxation.
Alternate nostril breathing has been shown to enhance cardiovascular function and to lower heart rate.
Nadi shodhana is best practiced on an empty stomach. Avoid the practice if you’re feeling sick or congested. Keep your breath smooth and even throughout the practice.
To do this:
Choose a comfort
able seated position.
Lift up your right hand toward your nose, pressing your first and middle fingers down toward your palm and leaving your other fingers extended.
After an exhale, use your right thumb to gently close your right nostril.
Inhale through your left nostril and then close your left nostril with your right pinky and ring fingers.
Release your thumb and exhale out through your right nostril.
Inhale through your right nostril and then close this nostril.
Release your fingers to open your left nostril and exhale through this side.
This is one cycle.
Continue this breathing pattern for up to 5 minutes.
Finish your session with an exhale on the left side.
3. Equal breathing

Equal breathing is known as sama vritti in Sanskrit. This breathing technique focuses on making your inhales and exhales the same length. Making your breath smooth and steady can help bring about balance and equanimity.
You should find a breath length that is not too easy and not too difficult. You also want it to be too fast, so that you’re able to maintain it throughout the practice. Usually, this is between 3 and 5 counts.
Once you get used to equal breathing while seated you can do it during your yoga practice or other daily activities.
To do it:
Choose a comfortable seated position.
Breathe in and out through your nose.
Count during each inhale and exhale to make sure they are even in duration. Alternatively, choose a word or short phrase to repeat during each inhale and exhale.
You can add a slight pause or breath retention after each inhale and exhale if you feel comfortable. (Normal breathsing involves a natural pause.)
Continue practicing this breath for at least 5 minutes.
4. Resonant or coherent breathing
Resonant breathing, also known as coherent breathing, is when you breathe at a rate of 5 full breaths per minute. You can achieve this rate by inhaling and exhaling for a count of 5. Breathing at this rate maximizes your heart rate variability (HRV), reduces stress, can reduce symptoms of depression when combined with yoga.
To do this:
Inhale for a count of 5.
Exhale for a count of 5.
Continue this breathing pattern for at least a few minutes.
5. Sitali breath
This yoga breathing practice helps you lower your body temperature and relax your mind.
Slightly extend your breath in length but don’t force it. Since you inhale through your mouth during Sitali breath, you may want to choose a place to practice that’s free of any allergens that affect you and air pollution.
To do this:
Choose a comfortable seated position. Stick out your tongue and curl your tongue to bring the outer edges together. If your tongue doesn’t do this, you can purse your lips.
Inhale through your mouth. Exhale out through your nose. Continue breathing like this for up to 5 minutes.
6. Humming bee breath (bhramari)
The unique sensation of this yoga breathing practice helps to create instant calm and is especially soothing around your forehead. Some people use humming bee breath to relieve frustration, anxiety, and anger. Of course, you’ll want to practice it in a place where you are free to make a humming sound.
To do this:
Choose a comfortable seated position.
Close your eyes and relax your face.
Place your first fingers on the tragus cartilage that partially covers your ear canal.
Inhale, and as you exhale gently press your fingers into the cartilage.
Keeping your mouth closed, make a loud humming sound.
Continue for as long as is comfortable.
The takeaway
You can try most of these breath exercises right away. Take the time to experiment with different types of breathing techniques. Dedicate a certain amount of time at least a few times per week. You can do these exercises throughout
Breathing habits
Unhelpful breathing habits will make you feel more out of breath.
When you’re out of breath, you may feel like you need more air. So you may start to take more air into your lungs or breathe faster. You might then not take the time to fully empty your lungs as you breathe out. This means you use the top of your chest more to breathe, instead of using your whole lungs. Breathing like this is more work – your muscles will get tired more quickly, and you’ll feel even more out of breath.
The good news is there are breathing techniques you can use to breathe more efficiently and to feel in control of your breathing. If you practice these techniques and use them every day, they’ll help you when you’re active or if you suddenly feel short of breath.
CURE YOUR BREATHLESSNESS WITH BEST PHYSIOTHERAPY CLINIC IN DHKOLI
Physical therapy is best alternative treatment for curing yourself from breathlessness without the use of medicines. Blossom physiotherapy center is the leading physiotherapy center in Dhakoli. They provide all treatment with experienced doctors and the use of modular modality. Dr. Jyoti Gupta senior consultant physiotherapist she is MPT in pediatrics. She is H.O.D in Blossom physiotherapy center and having experience of numerous years in this field. Dr. Jyoti Gupta always works on root cause of the problem and treat accordingly along with positive and visible out come. So I will advise you to visit one time you will defiantly feel the change not only in your physical health but also in mental health. Blossom physiotherapy is ready to help you in every manner. For further information log into blossomphysitherapy